Установка MySQL 8 в Ubuntu 22.04
Введение
MySQL – сервер баз данных с открытым исходным кодом, разработанный шведами, распростараняется бесплатно. Позже стала частью компании Oracle. Сейчас мы рассмотрим процесс установки сервера MySQL 8 на Ubuntu Server 22.04 и настройки внешнего доступа к базам данных.
Устанавливаем MySQL сервер на Ubuntu
По традиции все подобные статьи всегда начинаются с обновления операционной системы. Вуаля:
sudo apt update
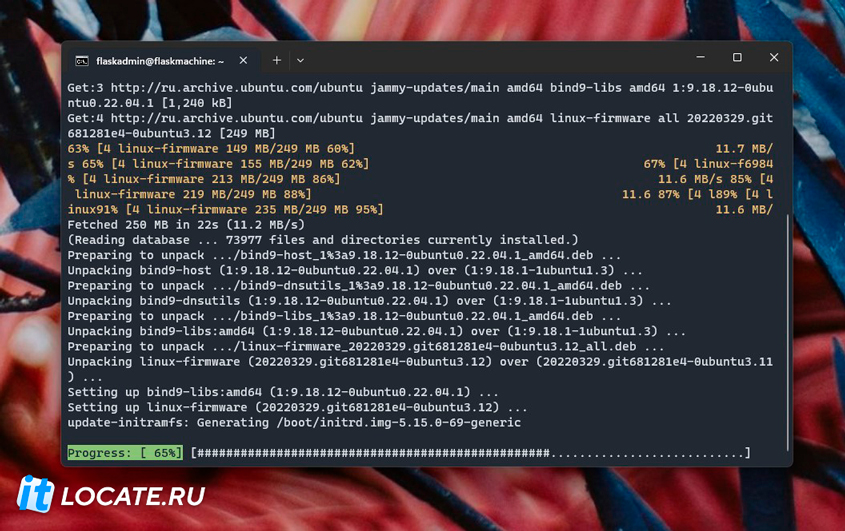
А так как в репозитории Ubuntu стандартно всегда присутствует последняя версия MySQL, то ни скачивать отдельно с сайта ни подключать дополнительных репизиториев нам для установки MySQL на Ubuntu 22.04 не потребуется. Просто откройте терминал и введите следующую команду.
sudo apt install mysql-server mysql-client
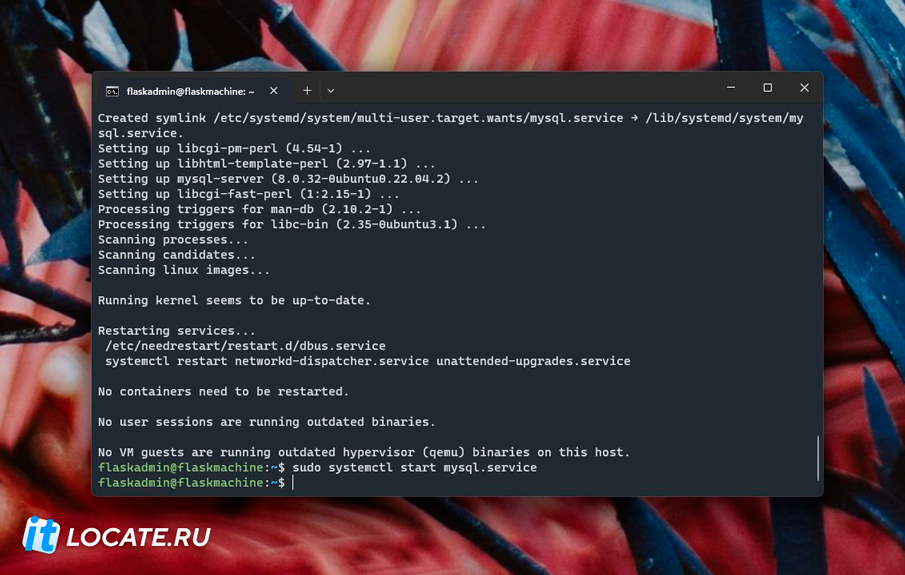
Ну, а после установки нам нужно запустить сервис MySQL.
sudo systemctl start mysql.service
Настраиваем MySQL сервер
В установке MySQL на Ubuntu 22.04 ничего сложного не оказалось, правда ведь? Теперь нам нужно настроить наш sql сервер. Для начала запустим его.
sudo mysql
И первое, что нам нужно, так это установить рутовый пароль на MySQL сервер
mysql> ALTER USER 'root'@'localhost' IDENTIFIED WITH mysql_native_password BY 'М0Й_П@РОЛb';
mysql> exit
Теперь перейдём к самим настройкам. В терминале нужно запустить команду ниже. Запустится скрипт, который пошагово поможет нам настроить первоначальную конфигурацию нашего MySQL сервера на Ubuntu. (вывод команды и расшифровка ниже)
sudo mysql_secure_installation
Вывод команды sudo mysql_secure_installation:
~$ sudo mysql_secure_installation

Securing the MySQL server deployment.

Enter password for user root:

VALIDATE PASSWORD COMPONENT can be used to test passwords
and improve security. It checks the strength of password
and allows the users to set only those passwords which are
secure enough. Would you like to setup VALIDATE PASSWORD component?

Press y|Y for Yes, any other key for No: Y

There are three levels of password validation policy:

LOW    Length >= 8
MEDIUM Length >= 8, numeric, mixed case, and special characters
STRONG Length >= 8, numeric, mixed case, special characters and dictionary file

Please enter 0 = LOW, 1 = MEDIUM and 2 = STRONG: 2
Using existing password for root.

Estimated strength of the password: 100
Change the password for root ? ((Press y|Y for Yes, any other key for No) :

 ... skipping.
By default, a MySQL installation has an anonymous user,
allowing anyone to log into MySQL without having to have
a user account created for them. This is intended only for
testing, and to make the installation go a bit smoother.
You should remove them before moving into a production
environment.

Remove anonymous users? (Press y|Y for Yes, any other key for No) : Y
Success.


Normally, root should only be allowed to connect from
'localhost'. This ensures that someone cannot guess at
the root password from the network.

Disallow root login remotely? (Press y|Y for Yes, any other key for No) : Y
Success.

By default, MySQL comes with a database named 'test' that
anyone can access. This is also intended only for testing,
and should be removed before moving into a production
environment.


Remove test database and access to it? (Press y|Y for Yes, any other key for No) : Y
 - Dropping test database...
Success.

 - Removing privileges on test database...
Success.

Reloading the privilege tables will ensure that all changes
made so far will take effect immediately.

Reload privilege tables now? (Press y|Y for Yes, any other key for No) : Y
Success.

All done!
- Remove anonymous users – удалить аноноимных пользователей
- Disallow root login remotely – отключить удалённые подключения для root пользователя, это касается только удалённых подключений, подключения с localhost удалёнными не считаются.
- Remove test database and access to it – удалить тестовую базу данных.
- Reload privilege tables now – перезагрузить таблицу привилегий.
Заходим в MySQL под пользователем root, вас попросят ввести пароль:
mysql -u root -p
Чтобы настроить вход через команду sudo mysql (на мой взгляд так намного удобнее). Включим возможность аутентификации с auth_socket:
mysql> ALTER USER 'root'@'localhost' IDENTIFIED WITH auth_socket;
mysql> exit
Теперь мы можем логиниться в MySQL через sudo.
Создаём нового пользователя в MySQL и выдаём ему разрешения
Заходим в базу под рутом для того, чтобы создать нового пользователя:
sudo mysql
Создаем пользователя username и указываем пароль password для авторизации на нашем MySQL сервере:
mysql> CREATE USER 'username'@'%' IDENTIFIED WITH mysql_native_password BY 'password';
Выдаём новому пользователю привилегии (опционально):
mysql> GRANT CREATE, ALTER, DROP, INSERT, UPDATE, INDEX, DELETE, SELECT, REFERENCES, RELOAD on *.* TO 'username'@'localhost' WITH GRANT OPTION;
Или сразу всё в одном через параметр ALL.
mysql> GRANT ALL PRIVILEGES ON *.* TO 'username'@'%';
Далее приминяем внесённые изменения:
mysql> FLUSH PRIVILEGES;
И выходим из оболочки управления сервером MySQL
mysql> exit
И пробуем авторизоваться под только что созданным пользователем:
mysql -u username -p
Теперь давайте протестируем MySQL
Вот мы и настроили нашь MySQL сервер на Ubuntu 22.04. Теперь давайте удостоверимся, что служба mysql запущена и работает корректно. Запускаем команду:
systemctl status mysql.service
На выводе мы увидим, что сервис запушен и работает (active):
● mysql.service - MySQL Community Server
     Loaded: loaded (/lib/systemd/system/mysql.service; enabled; vendor preset: enabled)
     Active: active (running) since Mon 2023-04-03 06:12:56 UTC; 52min ago
   Main PID: 35355 (mysqld)
     Status: "Server is operational"
      Tasks: 39 (limit: 1025)
     Memory: 361.4M
        CPU: 20.924s
     CGroup: /system.slice/mysql.service
             └─35355 /usr/sbin/mysqld

Apr 03 06:12:55 system systemd[1]: Starting MySQL Community Server...
Apr 03 06:12:56 system systemd[1]: Started MySQL Community Server.
Если сервис не работает, запустите его командой:
sudo systemctl start mysql.service
Отлично, сервис работет. Теперь попробуем через подключение к sql серверу получить информаию о его версии, тем самым проверить его работоспособность.
sudo mysqladmin -p -u username version
Вывод:
~$ sudo mysqladmin -p -u username version
Enter password:
mysqladmin  Ver 8.0.32-0ubuntu0.22.04.2 for Linux on x86_64 ((Ubuntu))
Copyright (c) 2000, 2023, Oracle and/or its affiliates.

Oracle is a registered trademark of Oracle Corporation and/or its
affiliates. Other names may be trademarks of their respective
owners.

Server version          8.0.32-0ubuntu0.22.04.2
Protocol version        10
Connection              Localhost via UNIX socket
UNIX socket             /var/run/mysqld/mysqld.sock
Uptime:                 57 min 22 sec

Threads: 2  Questions: 25  Slow queries: 0  Opens: 182  Flush tables: 3  Open tables: 101
Queries per second avg: 0.007
Если у вас вывод в консоли похож на тот что выше, то всё хорошо. С основными настройками MySQL сервера на Ubuntu мы с вами закончили.
Удаленный доступ к MySQL
MySQL сервер мы установили, настроили, но мы с ним можем работать только локально, а для подключение к нему через сеть нужно дополнительно настроить такую возможность. Открываем на редактирование конфигурационный файл mysqld.cnf:
Редактирование конфигурационного файла
sudo nano /etc/mysql/mysql.conf.d/mysqld.cnf

Переходим к конфигурированию параметра bind-address:
# Instead of skip-networking the default is now to listen only on
# localhost which is more compatible and is not less secure.
bind-address = 127.0.0.1
Чтобы разрешить доступ с любых IP-адресов, укажите здесь 0.0.0.0.
Обратите внимание, что такая настройка может быть небезопасной. Рекомендуется использовать конкретный(ые) IP адрес, с которого вы собираетесь работать с базой данных.
После того как закончите редактирование конфига сервера MySQL, для применения параметров перезапускаем сервер MySQL командой:
sudo systemctl restart mysql
Даём привилегии пользователю на доступ из вне
Ок, сам сервер нам доступен по сети, но нужно настроить ещё и доступ для пользователя MySQL на доступ к серверу из вне. Запускаем клиент MySQL сервера
sudo mysql
И создаём пользователя
CREATE USER 'username'@'%' IDENTIFIED BY 'password';
Если мы хотим создать пользователя, который сможет подключаться только с определенного IP адреса (xxx.xxx.xxx.xxx):
CREATE USER 'username'@'xxx.xxx.xxx.xxx' IDENTIFIED BY 'password';
GRANT REPLICATION SLAVE ON *.* TO 'username'@'%';
FLUSH PRIVILEGES;
Почти готово :-)
Ограничения файрвола
Открываем порт для MySQL сервер на Ubuntu через iptables
И осталось настроить доступ из вне в самой Ubuntu. для этого в iptables нужно открыть порт 3306 (используется по умолчанию для MySQL сервера. Можно изменить в конфигурационном файле, который мы с вами редактировали выше). Если мы хотим открыть на доступ к MySQL на Ubuntu только для конкретного ip адреса:
sudo iptables -A INPUT -s xxx.xxx.xxx.xxx -p tcp --destination-port 3306 -j ACCEPT
А если мы хотим открыть для всех входящих соединений:
sudo iptables -A INPUT -p tcp -m tcp --dport 3306 -j ACCEPT
После можно проверить список правил файрвола в iptables следующей командой:
sudo iptables -nvL
Также мы можем настроить iptables для входящих только с определенных ip адресов, а для остальных запретить:
/sbin/iptables -A INPUT -s 127.0.0.1 -p tcp --destination-port 3306 -j ACCEPT
/sbin/iptables -A INPUT -s xxx.xxx.xxx.xxx -p tcp --destination-port 3306 -j ACCEPT
/sbin/iptables -A INPUT -p tcp --dport 3306 -j DROP
Открываем порт для MySQL сервер на Ubuntu через UFW
Ещё в Ubuntu по дефолту идёт оболочка UFW (Uncomplicated Firewall), можно через неё открыть доступ к порту нашего сервера MySQl:
sudo ufw allow 3306
А также, если нам нужно открыть только для определенного ip адреса:
sudo ufw allow from xxx.xxx.xxx.xxx to any port 3306
После завершения настройки проверьте, что пользователь может подключиться к MySQL удаленно. На другой машине запустите клиент MySQL с следующими параметрами:
mysql -u username -h xxx.xxx.xxx.xxx -p
Если в настройке сервера MySQL на Ubuntu 22.04 следовали всем инструкциям выше, то у вас должно было всё получиться. Если будут вопросы, пишите в комментарии. Всем Спасибо!